The QNAP of Death

Alternate title: the day my NAS died

A QNAP NAS with System Booting text

Not quite the same System Booting text I was greeted with, but close enough. Excuse the dust.

System booting? Yes but the system has been booting for literally hours now. If it hasn’t booted within five minutes, there’s something wrong.

And dear reader, there was indeed something wrong. I tried all the usual stuff; turning it off and on again, leaving it off for a couple of days, pulling all the hard drives out, turning it off and on in between all of those steps, but nothing worked, nor did it give me any kind of video output to indicate what might be wrong. It turned on, but wouldn’t boot into the OS. That probably should have been my first clue that although something was wrong, maybe it wasn’t completely dead. And if it wasn’t completely dead, then maybe there was something we could do to fix it.

But after unplugging every piece of hardware I had added to the QNAP and returning it to the stock hardware configuration, the thing would still not boot up properly, giving me that same error message. System booting. Whatever was wrong with it, it wasn’t because of something I had added or done to the system, which probably meant it was hardware-related. Ugh.

With my extensive troubleshooting prowess exhausted, it was time to turn to old mate Google.

Google immediately led me to a 100-page forum thread about the issue on QNAP own forums. This was either very good, or very bad. In my case it meant it was initially very bad because it meant I had to read through most of it, but then things turned out very good because within those 100 pages, there was the trifecta: a known recurring issue, exact steps to diagnose that specific issue, and a fix that worked for enough people for it to be considered the official unofficial fix.

The problem, as it was described, is some kind of “degraded” LPC clock. As I understand it, basically there’s some kind of timing component that keeps things in your PC running on time for lower-pin (Intel’s definition of lower-pin here actually means 1170 soldered pins) processors like the Intel Celeron J1900 in the QNAP that I have. What happens is that in some systems, including in my QNAP and even some Synology units, that the circuit for this LPC clock degrades over time due to “reasons”, and eventually reaches a state where it fails to provide a stable clock to the system, meaning that the CPU doesn’t work like it should. Or something along those lines, anyway.

According to the forum post it’s remarkably similar to an issue that affected the Intel C2000 Atom processors, which Cisco and Synology both issued advisories about all the way back in 2017, although that case was slightly more serious as it caused C2000 Atom-equipped gear to fail after as short as 18 months. In the case of my QNAP, it lasted over six years. Not bad, but buyer beware, I guess, not that you’d be able to tell this kind of thing at the time of purchase.

Thankfully, diagnosing the issue is pretty easy. Use a multimeter to measure the voltage between some pins or pads on the motherboard, depending on your specific model of QNAP, and if the voltage shows over 2V, your LPC CLK is likely broken and needs to be fixed if you want to use your NAS again.

The fix is easy enough as well. Because we need to drop the voltage of the LPC CLK signal, we can drop in a resistor. Experimentation by some helpful forum members indicated that a 100 Ohm resistor, soldered between the “negative cycle transistor” and ground, will restore the voltage to a correct value to allow the LPC CLK to supply a correct clock signal to the CPU.

Simple, right?

There was just one problem. Well, besides “the problem”. I don’t own a multimeter, nor a soldering iron. Oh, and I don’t really know how to solder. I’ve soldered before, but I wouldn’t say I’m particularly good at it. But as my old swimming coach used to say, no one is born knowing how to swim or solder, so I grabbed a cheap and cheerful soldering iron, some solder, a multimeter, and prepared myself for the hackiest soldering job in the world. Yes, it was really that bad. No, I didn’t trim the ends of the resistor. Yes, I probably should have. Yes, I managed to melt a little plastic connector next to where I was soldering, but in my defence, it was impractical to pull out the entire motherboard for easier access, so I kind of had to do it in situ while it was still attached to the case, which made it all the more awkward. No, I’m not going to show you a picture. Suffice to say, I got the job done. Just.

After all was said and done, and I put my drives back into the system, it booted up just fine. Not that I didn’t expect it to, given so many other people had had success after attempting the same fix, but it was still a relief. Getting the system back up and running again meant I didn’t have to try and go to lengths to recover the data I cared about, never mind wondering what was on there that I might have forgotten about in the first place.

I wish that was the end of the story. Alas, the forum had one more golden nugget of information to dispense, and that was that the fix was only temporary. Continued degradation of the clock timer was inevitable, and the next time it failed, there was no guarantee it would be fixable with any kind of resistor. It was hard to estimate how long the fix would work for, but six months to a couple of years seemed reasonable. Reasonable, but only if you were willing to put up with the fact that your NAS might die at any moment, and maybe even be completely unrecoverable from that point on.

Which worked for me, because now I knew that it was on the way out, it was time to build a replacement.
Retina Displays, Part Three

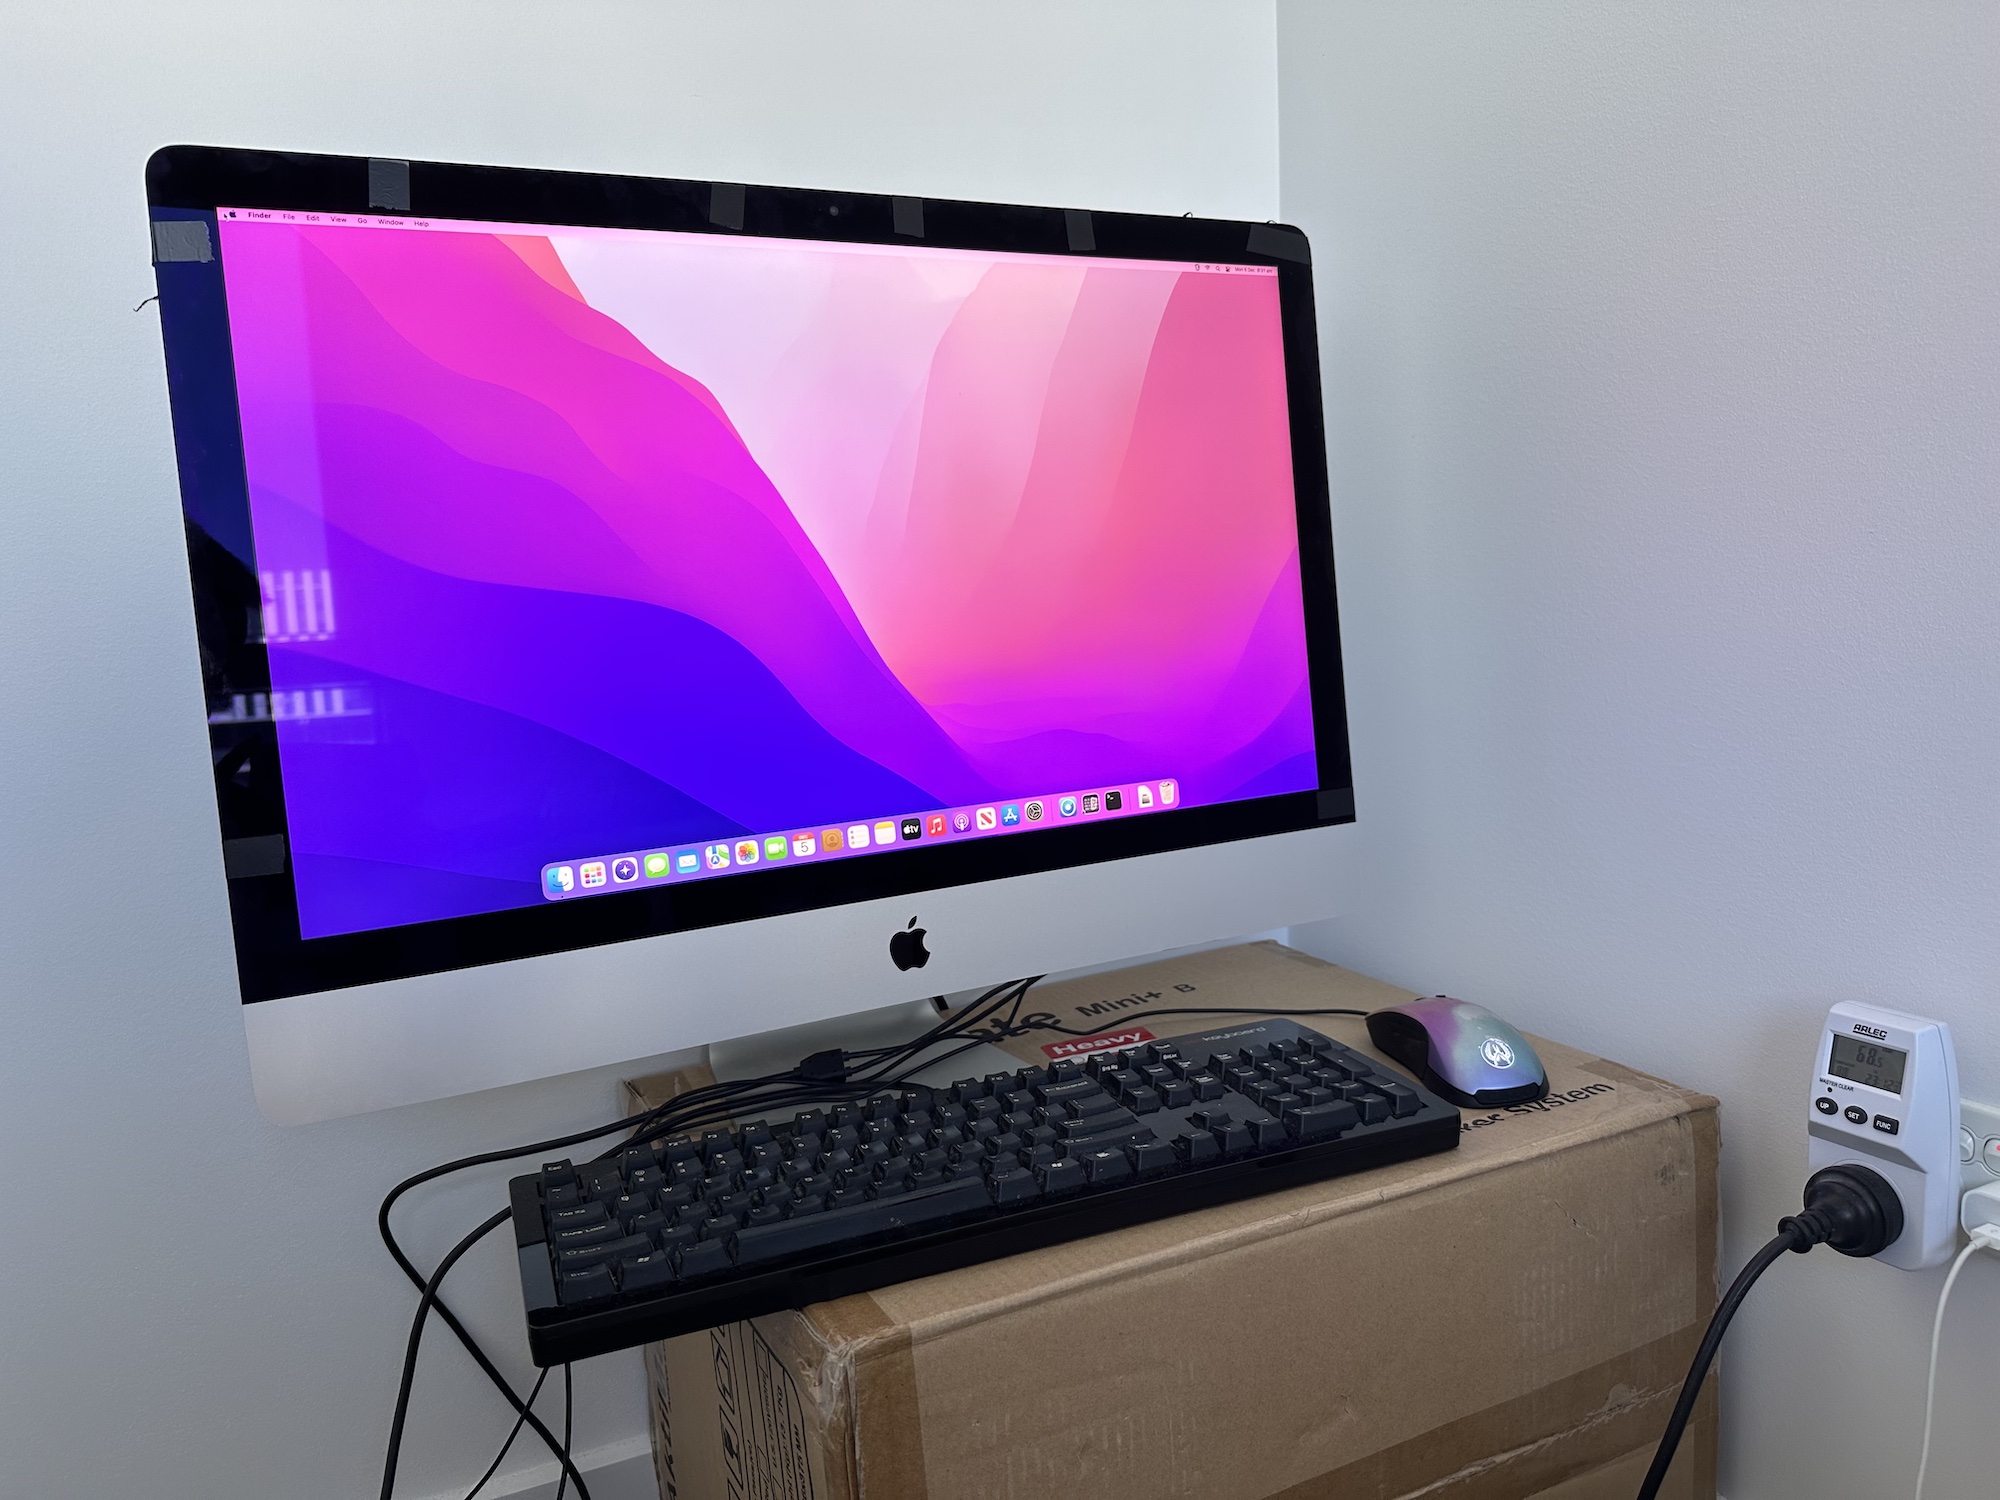
An iMac with its screen attached with electrical tape

Yes, the screen is attached via electrical tape. Temporarily, because attaching it with adhesive is a one-time thing.

By some fortuitous mechanism that can only be described as “scoring something off the local computer forum” (close enough to be my own version of “scoring something for cheap off Craigslist”), I am now the proud owner of a late 2015 27-inch iMac. Yes, that’s right, the one with a 5K display. Now to be clear, there’s something wrong with this iMac, which is why I was able to get it for so cheap, but I figure if I can put a little work into it to get it working again, then that’s time well spent, in my books.

It’s a pretty decent-specced machine, too; an 4GHz quad-core Intel Core i7 (as it turns out, the same i7-6700K CPU that’s in my current gaming rig), maxed out with 32GB DDR3 RAM, and an AMD R9 M395 with 2GB VRAM. It’s in great condition, too. There are some very minor, superficial scratches on the display that you can only see if you’re looking for them when the screen is off, but otherwise no chips, dents, or scratches anywhere else on the screen or on the external aluminium enclosure.

The issue with this particular iMac was that its internal 3.5-inch hard drive was dead. These iMacs came standard with a Fusion Drive, which was Apple’s term for a SSD and HDD combo that was supposed to give you the best of both worlds in terms of speed and storage. This particular iMac had a 128GB SSD that still seemed to be working, but its hard drive was only good for making clicking sounds and being recognised as an unknown 4GB storage device, which I’m taking to mean it was one of those even weirder hard drives with built-in SSD caches, or something.

Installing the latest supported OS on the thing turned out to be a nightmare, even for someone who has had some experience with Macs. No matter what I did, macOS Monterey would get halfway installed before rebooting and restarting the install process. At first I thought this was some kind of reboot loop — an issue I also experienced with my own late 2013 MacBook Pro when attempting to install Catalina or Big Sur, I can’t remember which — but no matter how many times I tried, I couldn’t get Monterey to finish installing. Catalina, on the other hand, installed fine. I had issues getting Big Sur install media working, so for the time being, it was Catalina or nothing.

I suspected my Monterey install issues were related to the failed internal hard drive. That seemed to line up with the random kernel panics I was getting in Catalina, where it seemed like macOS would attempt to access the internal hard drive, realise it was dead, and then freak out and fall over when it didn’t know what to do. It seemed Catalina was as far as this thing was going. At least not without opening it up, disconnecting the hard drive, and then trying again… which is what I ended up doing about two weeks later, after some tools arrived for me to open it properly (and put it back together again).

See, my original plan for this machine was to turn it into a standalone 5K display. I had first heard of the idea via The Sizzle, a great tech newsletter by the founder of MacTalk. By pulling out all the internals of the iMac and replacing them with a relatively inexpensive — I’d hesitate to call it cheap, but it was definitely cheaper than buying a standalone 5K display — driver board you can buy from AliExpress, you can turn your 5K iMac into a standalone display that you can drive via regular old DisplayPort, which is great if you’re after none of the complexities that come with a Thunderbolt-driven 5K display1. A YouTuber probably wasn’t the first person to turn a 5K iMac into a standalone display, but they probably contributed to popularising the idea.

Like I mentioned in my other post on Retina-class displays, there are very few options if you want something other than the not-quite-Retina-class 4K at 27-inches, and none of them can be had for under $1800. With any luck, this iMac conversion will be a third of that. Not cheap — you could easily buy a great display for $600, even if it’s not quite 4K 144Hz, but 1440p 144+ Hz is easily doable — but much less expensive than what a new 5K display would set you back.

Continue Reading →

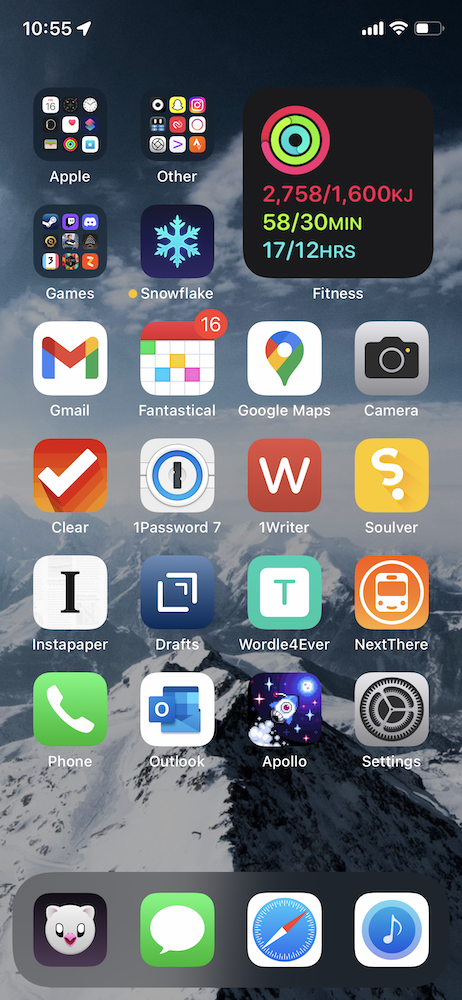
My iPhone 11 Pro Home Screen

It’s been three long years since I last had a new iPhone. While my iPhone 11 Pro remains a best-in-class smartphone that would undoubtedly serve me well for at least another couple of years, it’s time to move on.

But before we can do that, I kind of need to break down the apps that are currently on my iPhone 11 Pro home screen. For posterity’s sake, if nothing else, but mainly so I can look back on this one day and reflect fondly on the interfaces and design paradigms of the era, for a time in the not-too-distant future when we’re all using augmented reality interfaces.

I’m writing most of this while waiting for the delivery of my iPhone 14 Pro. I should have had it delivered to work and had someone else sign for it, because the worst part of having it delivered to your home address is needing to be listening intently for a knock at your door, or if you live in an apartment building like I do, the ringing of your wall phone to indicate someone has called your apartment from the outside. Now I’m stuck here at 6pm like some kind of hostage, waiting for a delivery that would ordinarily, on any other day, have been here already. But maybe there’s lots of iPhones on the StarTrack truck today, so the deliveries are taking a little longer than normal.1

In the future I think if I’m not getting my iPhone delivered to work, I’ll probably pre-order it for in-store pickup. If I take the day off work I can take it slow, pick it up from the store first thing in the morning, and then spend the rest of the day transferring all my stuff. Maybe taking the single day of annual leave is worth it.

It’s been a long time since my last iPhone home screen post. The iPhone X launched in 2017 to much fanfare because it was the biggest change to the iPhone silhouette in the entire history of the iPhone. The distinctive top and bottom bezels were gone, replaced by an almost uninterrupted edge-to-edge display that had a small notch at the top. The home button that had long contained a fingerprint Touch ID sensor was replaced with an upgraded front-facing camera system and biometric unlocking system called Face ID, which shone a pattern of infrared LEDs into your face so you could be recognised by your phone. Combined with an all-new gesture-based navigation system and an OLED display with curved corners that touched every edge on the front of the device, it was the future of iPhones for years to come.

The iPhone 11 Pro wasn’t that much different to the iPhone X in terms of the screen. Apple added an ultra-wide camera to the back, and spec-bumped just about every spec they could across the board, and that was about it.

Which might be why, although my home screen looks a little different, my apps stayed more or less the same.

Once upon a time choosing what apps to put on your home screen was a challenge because there were so many apps and only a 5×4 grid to put them in. There might be more and better quality apps now, but because we have folders and search, deliberately choosing which apps go on your Home Screen, versus those that are relegated to a folder, or worse, the App Library, remains as much of a challenge now as it was then, even if it’s for different reasons.

I’m still using a modified CGP Grey home screen organisation method, although the only tenet I choose to adhere to is “only one page of apps”. With some mental gymnastics I can claim to have a free row, although I definitely have four apps in my dock. The dock’s real estate is too important not to, but for big screen phone reasons, not because it’s the one row that stays static over multiple pages of apps, because the latter isn’t something that I have to consider when I only have one page of apps anyway.

Speaking of which, let’s get into the apps.

Continue Reading →

Stories from the road: I miss photography

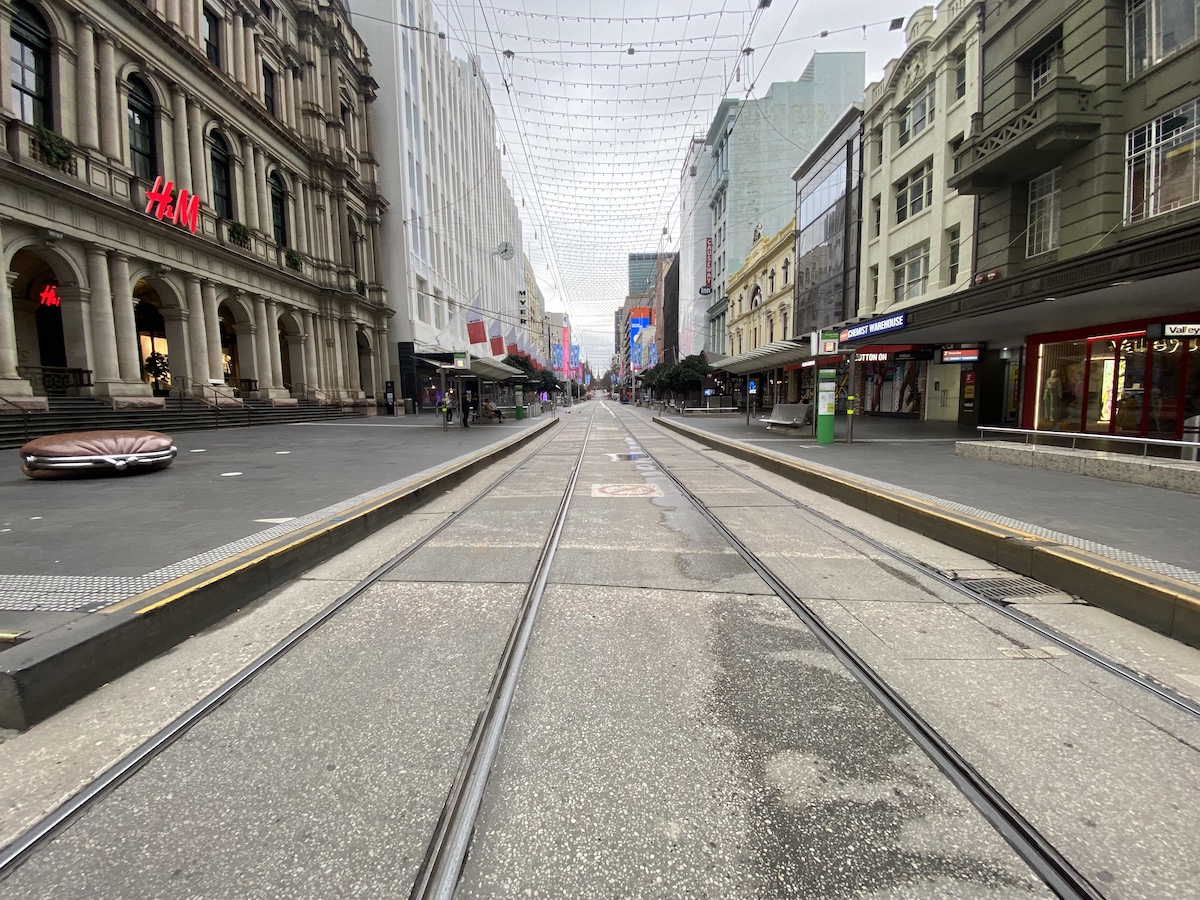
An almost-deserted Bourke Street Mall in Melbourne

An almost-deserted Bourke Street Mall in Melbourne

It’s September 4th, 2022. I’m in Melbourne for the first time in a long time. It’s been nearly 8 years since PAX 2014, and while there have been a few PAX events in between, and several interstate and overseas trips since, for some reason, I haven’t been to Melbourne in all that time. Proper Melbourne, as opposed to just transiting through.

And it’s every bit as good as I remember.

I was supposed to go to Melbourne earlier this year with friends. But ol’ rona was still a thing, and I didn’t think it was the best idea. I might have been right, too, because everyone that went caught it and ended up staying an extra week before they could travel back to Queensland.

It’s September now, and ol’ rona is still a thing. It definitely seems like it will continue to be for the foreseeable future, if that wasn’t clear before. Eventually, though, people are going to have to decide for themselves what kind of risk they’re willing to accept, because the alternative seems similar to becoming something of a complete recluse.

But this isn’t about rona, or travel. It’s about photography.

A little while I ago I took out my Bessa only to find that the battery was flat after not using it for a while. I replaced the batteries, and a quick test shot resulted in some kind of stuck shutter. After panicking a bit, I did a little searching online to discover it was a common enough issue that people had come across it before. A short bit of percussive maintenance later, and the shutter was un-stuck and Bessie was working normally again.

I do feel a little guilty about putting down my camera. I’ve hardly done any photography since moving to Brisbane, so much so that any film I had brought up with me from Hobart expired a little while ago. By “a little while ago”, I mean a few years ago, so yeah, you could say it has been a while.

But it wasn’t until I went to Melbourne to see the sights and sounds that I realised how much I missed taking photos. I heard from my friends who went to Melbourne earlier this year that the city was so much different post-Covid, that it seemed less lively and a shadow of its former self, but if that was the case, I didn’t see it. Melbourne city seemed about the same as I remember from all those years ago, even if it wasn’t as busy as it was pre-Covid.

I ended up taking a few shots with my iPhone 11 Pro, and compared to the iPhone 6 that I had the last time I was in Melbourne, the versatility and quality of the 11 Pro camera system was leaps and bounds ahead. Not entirely unexpected given the multi-generational gap between the two, but phone cameras have performed wonderfully in great lighting conditions for years now. Probably since the iPhone 7 or iPhone X, now that I think about it.

But as much as I liked the photos coming out of my iPhone, it made me miss a standalone camera. Taking photos with an iPhone felt like cheating, somehow, because it was all too easy to get good photos. Point and click, right? With iPhone, anyone can be a photographer. And that’s great! But taking photos with a real camera feels nicer, somehow, like you’re a little more involved in the process rather than letting a bunch of computers and algorithms do all the photography for you.

Melbourne made me miss taking photos.

I miss taking photos with a real camera, and the only fix is to start taking photos again.

More (Retina) Display Thoughts

Dell U2711 beside a white MacBook

Simpler times. My setup from November 2010, featuring a Dell U2711 beside my white MacBook of the time.

If I’m honest, I was a little early to the 4K train. Had I known about the Retina-class displays that would be coming out not that long after I purchased my first, current, and only 4K display, I would probably have waited a year or two. That’s not saying I don’t love my Dell P2715Q — having a 4K, 60Hz, IPS display in late 2014 for under $1000 was a pretty sweet deal at the time — but had I known about the higher pixel density displays that were coming out, I might have waited. But predicting the future of technology is a fool’s game, and hindsight, as they say, is 20/20.

Retina-class displays are a mess. You can count the models you can currently buy new on one hand, and none of them come in under $1800. The introduction of Apple’s own Studio Display means there’s now exactly three models you can buy new today, making it an exclusive club indeed. LG’s UltraFine 5K, Apple’s own Pro Display XDR, the Apple Studio Display… and that’s it! There are a bunch of older models that you can’t find new today, but even at “peak Retina” a few years ago, there were never more than a handful of models available that came with roughly 220ppi. There are some that come close, like LG’s UltraFine 4K, but even then that costs over $1000 today, which would otherwise buy you a nice 4K high-frame rate IPS display (more on this in a sec).

Reviews indicate that the Studio Display is a fine display. While it costs similar to what a 27-inch, 5K iMac cost back in the day, with the latter having the price advantage of including a whole-ass computer, there’s still some value there for people firmly ensconced within the Apple ecosystem and want a quality display that’s not the Pro Display XDR and the eye-watering price that comes with it. The Studio Display comes with some innovative features that haven’t yet been seen in any display so far, thanks to the A13 SoC and whatever version of iOS its runs. Centre stage is cool, I’ve read that the speakers sound great, and perhaps most importantly, it probably won’t have the same quality and reliability issues that have plagued the UltraFine 5K, despite the latter being a much simpler display without the bells and whistles of the Studio Display. It turns out that if you want reliability, you strap an iPhone to the display and call it a day. Hey, if it works, it works.

But it’s not for me. A lot of people have been wondering if Apple would ever get back into the display game, and now they have, I’m not so sure that Apple would ever make a Retina-class display for me, someone that wants a quality panel without all the bells and whistles.

I’ve been thinking about upgrading my display for a while now. I’ve had a Dell P2715Q since late 2014, and it’s probably about time I started thinking about my next display. While my dream display — 4K or higher res, 120Hz or higher, and IPS HDR or OLED HDR, doesn’t exist yet, it’s getting close to that time I want something better.

I’d like a Retina-class display as much as the next guy. My primary computer is a Mac, and a 5K, 60Hz display could easily be suitable for both general computing and some gaming, just like my 4K 60Hz is currently. But my choices are either an UltraFine 5K, or Apple’s Studio Display, and neither of those can be had for under $1800. And plus, it just wouldn’t feel like that much of an upgrade for that kind of money. The only real thing they’re offering that my current Dell can’t is higher pixel density.

So what’s the alternative? Thankfully, 4K 144Hz HDR displays are becoming more and more common, and if you’re looking in the 27-inch sweet spot, there are quite a few options.

Continue Reading →

Benny’s Top Tunes

photo showing iPod dock clearance specials and other accessories

At its peak, the Australian Apple Premium Reseller known as Next Byte had more than 20 stores around the country, and I spent most of my earliest possible employment years at just one: Next Byte Hobart.

Today, the Apple landscape in Australia is a lot different to what it was over a decade ago. Thanks mostly to the iPhone, Apple is the largest company in the world. Apple owned-and-operated retail locations don’t so much compete with general electronics retailers as much as they offer an experience of their own. But as any reseller will tell you, slim profits on Apple products means it’s extremely difficult, if not outright impossible, to match Apple when it comes to the unparalleled customer experience that Apple Retail can offer. Any third-party Apple presence is either small enough to fly under the radar, or niche enough to carve out a market of their own. For the rest of us, Apple retail stores in every capital city CBD besides Melbourne, Darwin, and Hobart means out in-person sales and service needs are fulfilled, with any gaps covered by Apple’s online store and mail-in repair programs.

I have plenty of stories from my time at Next Byte. Maybe one day I’ll even write about a few of them, once I’m a little more comfortable the statute of limitations has passed. The one I’m telling you about today is about the music we listened to while in the store, but also about the music I listen to.

Background music. Unless there is none, you never really notice it. Which is exactly how good background music works, seamlessly blending into the background of whatever you’re doing, and subtly preventing an eerie silence from descending. If you’ve been to any retail store lately, chances are it’ll be there if you listen for it, but otherwise it’s just providing a little filler noise to create a comfortable atmosphere to do your shopping in.

In the early days at my place of employment, there wasn’t any mandated background music. No specific genres, and certainly no set playlist. That meant we could, more or less, play whatever music we wanted. Provided there was at least some reasoning applied about what was and wasn’t appropriate for the retail setting we were in, we were given total freedom over what we chose to play, and there wasn’t really any limit on what could and couldn’t be played. No death metal and nothing religious, obviously, but pretty much everything else was fair game, or at least was until someone questioned it. After all, it was just background music. It was supposed to be unnoticeable. Maybe not unremarkable, but certainly not outlandish enough to draw attention.

And boy, did we play pretty much everything. There was a lot of pop, which I was completely fine with. But I remember a lot of indie stuff being played, a lot of soft-rock, gentle/casual stuff, and plenty of stuff from Triple J, back when it was good. Even plenty of stuff from local Tassie artists and bands, which I thought was pretty cool. It was sometimes surprising what we got away with, but it turns out that if you play something quietly enough, no one notices. Which is perfect for background music.

Because we were an Apple retailer, an added bonus was that we got to play it on some truly great sound systems. There was the venerable iPod Hi-Fi, of course, which we used an AirPort Express to AirPlay music to. When Sonos systems became a thing, we started using the Sonos Mac app even though it didn’t integrate with iTunes to begin with; I think we started using (the now-defunct) Rdio for that specific reason.

We had plenty of iPod docks as well, none of which I remember the names of now, but the real standouts were always the higher-end docks and speakers from brands with known sound chops. Bowers and Wilkins was the most memorable of these. Even when the store was busy, no one really minded if you turned up a good-sounding dock to drown out everything else for a few moments, if you were doing it for the purposes of demoing it to a prospective buyer. Blasting something, anything, was certain to draw the attention of everyone in the store. Customers and staff alike would have their conversations interrupted momentarily and look up to find the source of the din. But even then, raising the noise level above ambient was fine as long as you didn’t play anything questionable, or turn it up too loud for too long, they realised soon enough that you were just giving a demo to a customer, and went back to what they were doing.

The thing about background music was that no one really wanted to spend too much time on it. Between serving customers, and selling Apple products, background music joined a list of administrative tasks that needed to be done, but wasn’t as important. As much as great background music was entirely unnoticeable, the best background music was the playlist you could cue up at the start of the day and only worry about if it stopped playing, or wasn’t resumed after being paused.

For that reason, we had pre-prepared playlists of retail-appropriate background music ready to go. They contained easy listening tunes we liked. Music that created a chill atmosphere. Remember, all of this predated music streaming, back when people purchased their music off the iTunes store or acquired it through other means. Playlists were a much bigger deal because in those days, you couldn’t just outsource your playlist creation to everyone else or just let the algorithm take the wheel (all praise the mighty algorithm). When we were doing our prep for the day, we’d start a song from one of several playlists, set iTunes to shuffle and repeat all, and that would be it. The best background music was entirely set-and-forget.

But on the days that I worked, I occasionally eschewed the normal playlists in favour of my own. Sometimes my playlists were exclusively newer pop hits or whatever brand-new album I had purchased at the time, and other times they contained my favourite subset of the existing retail playlists mixed in with a few of my pop favourites.

Whether intentional or not, these playlists meant that other staff would hear the same songs, over and over, on the days that I worked. There was nothing wrong with the tracks I had in the playlists, but by some accounts there may have been too few of them. This meant that some songs were played more than once per day. Generally not more than a couple of times per day, but over consecutive days, it became noticeable.

Which is how “Benny’s Top 40” came into being.

Continue Reading →