In all seriousness, why? It syncs with your phone, but what is your phone for?!
Archive | 2012
Film (is not dead)
For about a fortnight now I’ve been experimenting with film photography. Truth be told, I don’t even think I’ve touched my DSLR in that time, and here’s why: film is not dead.
Far from it, in fact.
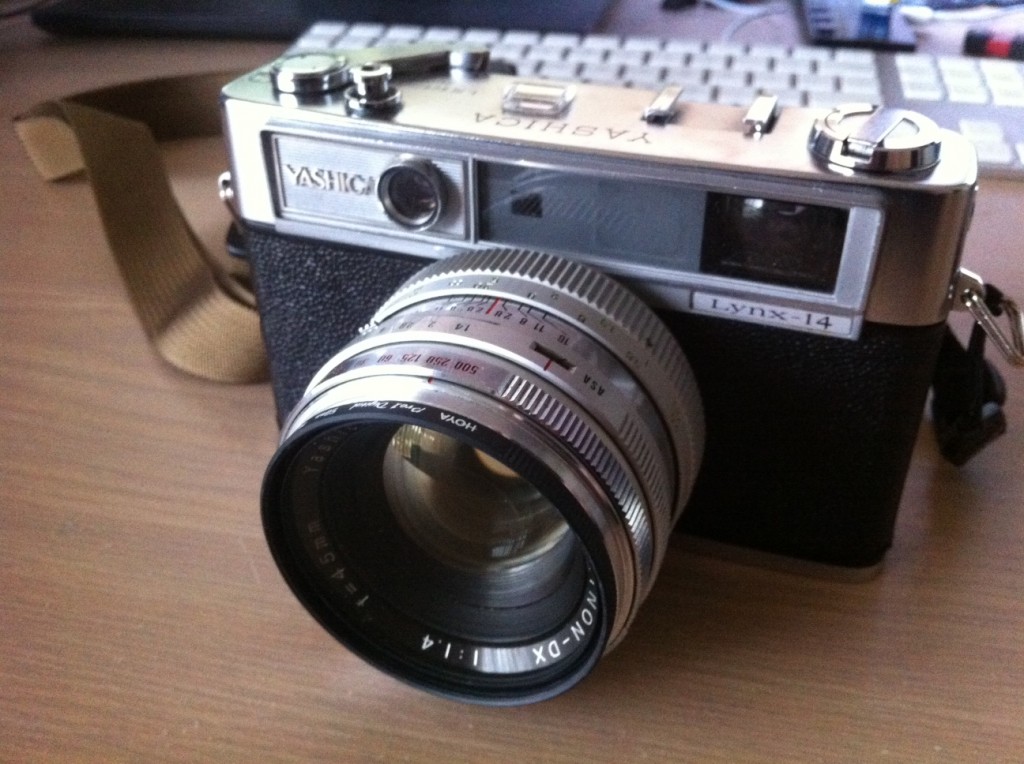
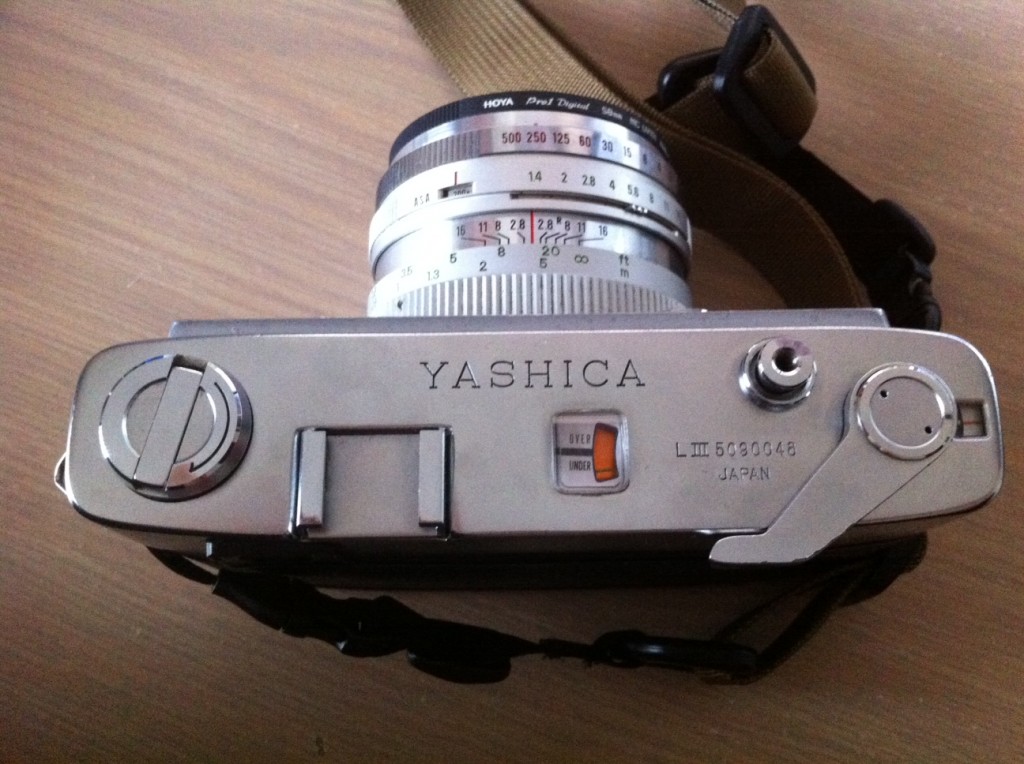
Our story today starts with an old 35mm rangefinder I bought off a guy recently. It’s a Yashica Lynx 14 from 1965, one that comes with a super-quiet leaf shutter and a huge, 45mm f/1.4 lens that completely dominates the camera. 58mm filters are gargantuan compared to normal rangefinder lenses, and big even compared to some of my DSLR lenses. There’s also a self-timer that runs for “approximately 8 seconds”, in case you were thinking of taking selfies without a mirror or something.
Not that you would want to, of course due to how incredibly awkward it would be at first: it’s manual everything: manual focus and manual exposure, featuring manual shutter speed and manual (stepless!1) aperture. The built-in light meter didn’t work when I received it, but I imported a few Wein cells which fixed fixed that up (mercury batteries are a little hard to come by these days, so mercury replacement batteries are the next best thing). Other than that, one of the greatest things about this camera and so many others like it is that it’s completely mechanical: the only reason you need batteries at all is for the light meter, which isn’t that big of a deal as you can always guess exposures or use a stand-alone light meter (or your iPhone, or your DSLR). The ability to take photos without batteries, is a pretty big deal.
Why a film rangefinder, I hear you ask? I guess between a film rangefinder and a film SLR, the decision was pretty simple. They’re both about the same in terms of availability, and more or less around the same price range. Buying something like an EOS-type SLR body wouldn’t have been all that different to my current digital SLR. A later-generation EOS film body might have allowed me to use my current glass, but I wanted to shoot film mostly because it was different to digital. That meant I needed something much more different than my current DSLR, and for that, I needed a rangefinder. If I’m being honest, I just wanted a smaller, more discreet camera for street, a topic for another time.
Taking photos with a rangefinder is different to what you’re probably used to, as well as being much the same. One of the main differences is how you focus: there’s a small patch in the viewfinder that you place over your subject, at which point you focus your lens using the “overlapping” image that appears. When the two images overlap perfectly and are superimposed over one another, then you’re in focus. It’s really quite cool, and makes for a unique way of focusing. There are downsides to this method though, the main one being that it doesn’t work well with low-contrast images/subjects. For the most part, it’s perfectly okay.
For two weeks, I used my Yashica rangefinder almost exclusively, and how I shot during the first week was by metering shots using my iPhone or on occasion, my DSLR, translating the same aperture and shutter speed to my Lynx, framing, and taking the shot. The batteries for the built in light meter didn’t arrive until the second week, so for the first week I’d meter my shot, use the same shutter/aperture on my Lynx for that speed film I was using, and take the shot. Sometimes metering the shot was too time-consuming and pretty unwieldy having to get out my iPhone/DSLR and consult its superior metering (actually, now that I think about it I’m going to have to go with it was unwieldy most of the time), so for the first two weeks I guessed a fair few exposures based on the light conditions of the previous shots.
I more or less started and finished the first two rolls of film in an afternoon in the first week, all without an in-body light meter. I decided to get them developed as prints-only, as they were mostly just “test shots” to see how things would turn out if I was guessing exposures (not to mention one of my first real experiences with manual focus).
These first two rolls turned out okay, surprisingly. I was guessing exposures for much of it, and only one or two were grossly over- or under-exposed. Most could have done with an extra stop (or minus) here and there, but mostly they were pretty good. Focus didn’t seem to be an issue either, but I think that could mostly have been attributed to the higher apertures I was shooting at, upwards of f/8 or so.
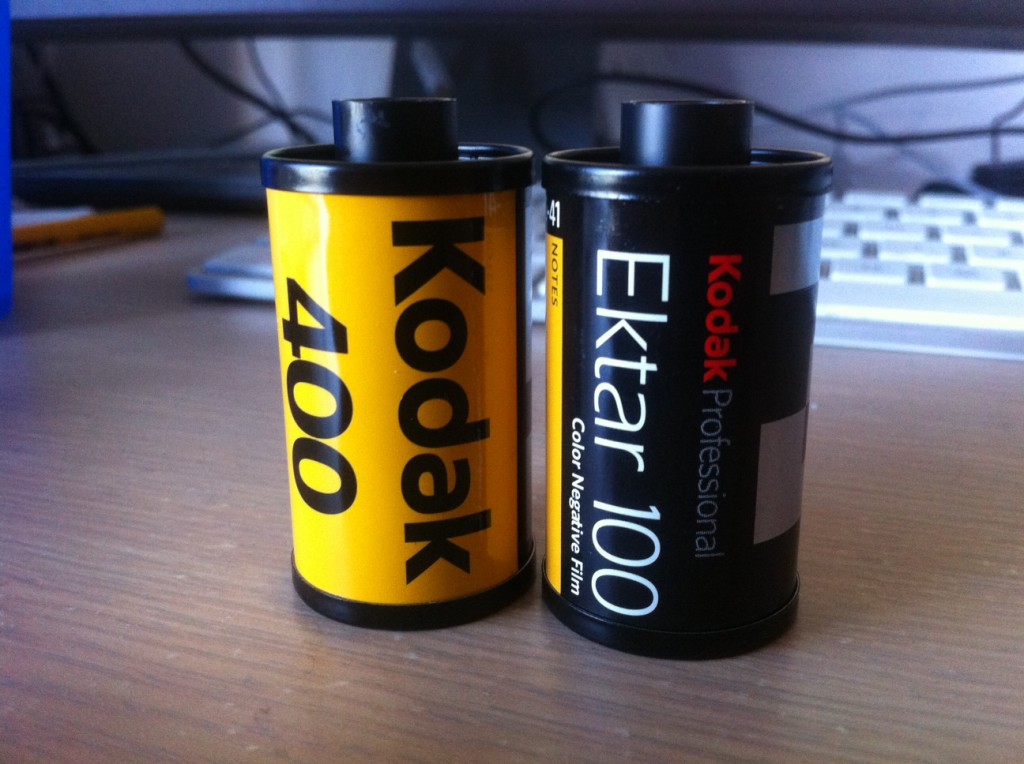
After the success of my first two rolls, I was excited to do another two, centered around what I would normally be shooting (i.e. candids of people on the street).I got them back last week, and imagine my disappointment when they turned out worse than the previous two rolls. Quite a few shots were out of focus and exposures were all over the place. Suffice to say, my manual focus skills could definitely be improved — but I was kinda expecting that with film that was two stops more sensitive (and thus needing slower shutter speeds/a wider aperture for the same light).
Taking photos with a rangefinder is incredibly good fun. If you’ve never experienced shooting with a film rangefinder, you’re missing out one of the best shooting experiences you can have. Part of it has to do with the fact that you’re doing exposures manually according to what your iPhone light meter says, or trying to do the whole “match needle” thing for every new lighting situation. The other part of it is the entire feeling of film photography: without getting too hand-wavey, depressing the shutter then manually advancing the film using the film advance lever every time you take a shot is something special, as is rewinding the film back into the cassette when you’re done with that roll.
The truth is, I’ve been wanting to try film for a while. Ever since getting a digital camera I’ve wanted to give film a go: not because there are any inherent advantages in film vs digital, but because it’s just something different. Plus, the barrier to entry is relatively low, with a few exceptions (ongoing cost of film and developing). Film has always held this kind of special aura for me, and that might have been to do with the fact that most of my childhood pictures are from an electric film camera (auto-advance and rewind, wow!) that’s still floating around, incidentally.
And you know what? I think I like it. I like it a lot, in fact. I don’t think I’m quite ready to ditch my digital kit entirely as that still has advantages of its own (on-demand, selectable ISO up to 12,800 without having to change film is more of a plus than you would think), but I’m warming up to the idea of shooting predominantly film. There’s something appealing about film photography that can’t be quantified in words, something that can’t be explained except in pictures. It’s just good fun. I’m not saying digital is cheap or anything, but shooting film gives you a whole different appreciation for photography, even more so if you’ve only shot digital thus far, and even more so again if you have an all-manual camera and you’re doing exposures manually.
Now, if only I had a better film camera…
Inside the mind of the octopus
For its color palette, the octopus uses three layers of three different types of cells near the skin’s surface. The deepest layer passively reflects background light. The topmost may contain the colors yellow, red, brown, and black. The middle layer shows an array of glittering blues, greens, and golds. But how does an octopus decide what animal to mimic, what colors to turn? Scientists have no idea, especially given that octopuses are likely colorblind.
But new evidence suggests a breathtaking possibility. Woods Hole Marine Biological Laboratory and University of Washington researchers found that the skin of the cuttlefish Sepia officinalis, a color-changing cousin of octopuses, contains gene sequences usually expressed only in the light-sensing retina of the eye. In other words, cephalopods—octopuses, cuttlefish, and squid—may be able to see with their skin.
via Inside the mind of the octopus | Orion Magazine.
Good read.
Shutter Priority
I’ll keep this short: don’t laugh, but I learned when1 to use shutter priority the other day, and it boils down to this: when you want to shoot at a certain shutter speed, then use shutter priority.
I’ve posted about this before:
So much of the time it’s like the three pillars are the world’s most intricate balancing act. Say you’re shooting people in an area where there isn’t much light. You start off in Av, at f/2.8 with an ISO of 100 — the camera says you’ll need 1/8th of a second, which means camera shake then becomes a factor. Upping the ISO above 800/1000/1250 means you have a more respectable shutter speed of 1/30, maybe even 1/60, but even at those speeds a shot can still be ruined by subject motion. In this kind of situation, what can you really do without adding more light into the equation? More ISO means your photos are starting to be fairly grainy indeed, and you can’t open the aperture any more because you’re already at the limit of your lens (or you want the DOF because nailing focus is hard, etc). Photography in these kinds of situations is seriously challenging, and it’s times like these that make you think: “hey, this stuff isn’t just child’s play”.
Then there was that short except that mentioned the theory behind shutter priority:
When you’re in low light, the two main worries are about exposure (not getting enough light) and camera shake (blurry pictures). If you set the camera to aperture priority then you’re only really dealing with half of the problem, which is light. When you’re in shutter speed priority, you can account for the camera shake (say, 1/30 or 1/50 of a second) and the aperture will adjust around the speed to produce the exposure.
I read that. Thought I understood it. It wasn’t until I actually tried it (and it worked) that I really understood it, though.
I shot a thing that didn’t have great lighting, and I was already at the ISO I was happy to shoot at (800, if you’re curious). I turned the mode dial to shutter priority, set it to 1/250, and voila — photos. Photos with a tiny DOF due to the 1.4 aperture of the lens I was using, yes, but much, much better than blurry photos. Maybe I’ll up the ISO next time even further; it’s only really noticeable in a handful of shots, and I would have liked more DOF for some group shots.
All in all, I was pretty happy with the results: this was probably the first “oh wow, this stuff actually works” moment I’ve had since taking photos. It’s crazy to think what’s possible if only I would try.
Up next: a short thing on film. Or maybe that Kindle review, we’ll see.
-
Those with excellent reading comprehension will notice I used the word “when” instead of “how”, and that makes all the difference in the world. Like I said: you can read a billion things on photography and how to take better photos, but sometimes it won’t really click until you get out there and do it. Better gear won’t necessarily make you a better photographer, but more time behind the lens (usually) will.
The Camera
Amazing.
Up and Go
Alternate title: And Now, For Something Completely Different
Yes, I still have a few different posts in the cooker, all waiting for the right time to be written. Some days you just get a million and one thoughts on whatever random thought pops into your head, and sometimes, you feel like writing about exactly none of it. Such is life. Anyway…
You know how sometimes, looking at or doing something can evoke a memory from the distant past?
Yeah. I have one of those moments every time I see Up and Go.
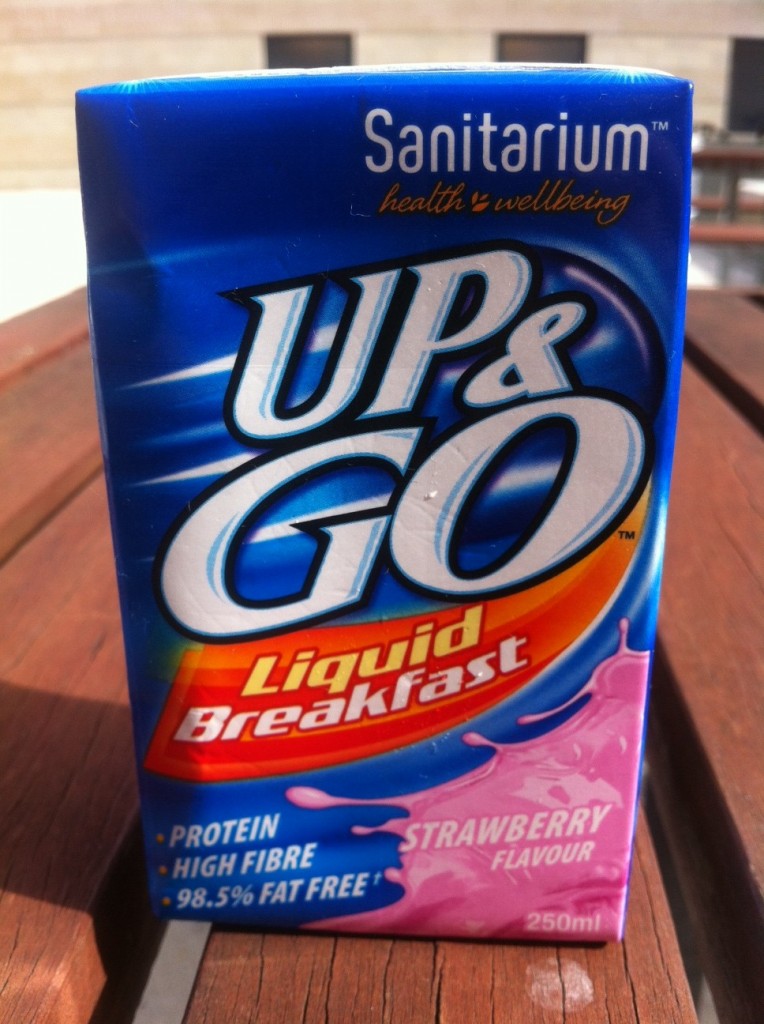
For the uninitiated: Up and Go is like a drink, right. It’s made by the Sanitarium company, and it’s kinda like a liquid breakfast replacement, and it’s spectacularly delicious. Tastes kinda like sweetened soy milk, except it’s more viscous, having the same viscosity as, say, a slightly runny milkshake. It tastes like milk, for the most part, at least the kind of flavoured milk you buy in cartons. All up, it has a flavour and texture that’s uniquely hard to describe — it’s similar to a few things, but the same as none of them.
The packaging proudly proclaims that it has all kinds of things-that-are-supposed-to-be-good-for-you. It has protein! And it’s high in fibre! And it’s 98.5% fat free! I’m unsure about what kind of dietary benefits it actually provides, and as for it being a liquid breakfast… well, it does mean you can get up and go find a real breakfast, preferably in the trendiest little coffee shop you can find. It won’t give you wings or anything like that, but it is pretty tasty.
Far and away though, the thing I love most about Up and Go is the memory it evokes every time I see it in the supermarket, (inevitably) buy it, and then drink it. And you thought you lived a sheltered life: I was only introduced to this stuff way back in 2006!
I remember it clearly: we were on the Year 10 Outdoor Ed camp, a 5-day hike through some fantastic bushland (I forget where) with only what we had in our ruck. It was the third or fourth night when we camped right near a river, and one of my friends had this great Up and Go stuff. I mentioned I hadn’t tried it before, so she gave me one of hers. I read on the package that it was best served chilled, and it was either then that she or I came up with the idea to put it in the river overnight so it would be chilled by the next morning. I think it was mentioned half-jokingly, but being young and foolish I did so anyway…
The next morning, I awoke and eagerly went to check on my Up and Go so I could, you know, up and go for another long day of walking. It was then I discovered the Up and Go was very well chilled — I poked the included straw through the hole, and suddenly, tasted the most incredible beverage ever.
It was a fresh morning, but that was nothing compared to how intense this Up and Go was. From that point on, I was hooked — and now, every time I go interstate or house-sitting with friends, I try and track down a bottle or few boxes of Up and Go. That stuff is crazy good.
If you’re up for something new and have never tried Up and Go before, get a single box the next time you’re at the supermarket or at a corner shop. The 250ml package you see above comes in a 6-pack, but if you want just one hit, get the 750ml variety (I think). Enough to keep you up and going well past morning tea, at the very least…
Enjoy!


